How to use gears on a mid-drive electric bike

Mid-drive bikes – what do all the buttons and levers do? And how should you use them?
Congratulations. You’ve just purchased yourself an amazing new mid-drive e-bike, but now you’re left wondering what all the different levers, cables, buttons and digital readouts mean, and how you should best use them.
To start, here is some background info on the mid-drive systems and the Australian legislation:
Australia has adopted the same guidelines as the majority of Europe, which is called EN15194 – manufacturers have the choice of two power system limits in order to be classed as a “bicycle” or a “pedelec”.
1. If the motor is 200 watts or less, then no speed limiter needs to be applied, and a throttle system can be fitted (similar to a motorbike). This is the generally the most basic of systems and given its low power output, the laws of physics tend to govern the maximum speed attainable.
2. This would apply to the vast majority of mid-drive systems – a maximum output of 250 watts with a requirement for the assistance to be speed restricted to 25 km per hour (the bike doesn’t stop at 25kmh, just the assistance so the rider is free to pedal to whatever speed they want/are capable of beyond this). Bikes can have a throttle system but only to a maximum of 6 km per hour (most mid drive systems have a Walk Assist mode which utilises this limit).
One of the big benefits of a mid-drive system is the Torque they are able to produce. Torque is measured in Newton Metres (Nm for short) and can be likened to good old-fashioned strength, kind of like a Diesel engine in a car. So while here in Australia we are limited by the maximum allowable Watts, this can be offset by the higher torque output of the mid-drive motors.
How to get the most out of your mid-drive system:
The Motor
Currently, in Australia, there are two main mid-drive providers, Bosch and Shimano which we will reference through this article. Of the secondary players, Brose and Bafang fill out the majority of the market.

They all essentially rely on the same setup – a motor mounted at the bottom bracket (where the pedal axle goes through the frame) which feeds power to the rear wheel by way of a chain or belt drive. This power is in combination to the rider’s efforts. Basically, if someone isn’t turning the pedals, the bike isn’t going anywhere.
The sensors that pick up whether the pedals are being turned can rely either on Cadence (are the pedals moving around?) or Torque (Are the pedals being pushed down on?).
We find the best systems rely on Torque sensors as this means as soon as you press down on the pedals when taking off from stationary there is instant “signal” for the motor assist to kick in. Bosch and Shimano both use either the Torque sensing systems (Bosch) or a combination of Torque and Cadence (Shimano)
The other system, Cadence, has sensors that rely on the pedals being turned a fair distance before they pick up the movement. While some systems are better than others, none are as effective as the Torque sensing system.
The Gearbox
Along with the mid-drive motor, there is typically some form of “gearbox” and just to be even more confusing, the gearbox can be in a variety of forms. Thankfully in 99.999% of cases, it is either attached to or forms part of the rear wheel hub.
The most common gearbox is a cassette of cogs attached to the rear wheel, and a Derailleur that guides the chain up and down the cogs, the same as the majority of non-e-bikes.

Something to remember, the smaller the cog the chain is wrapped around on the rear cassette the harder it is to pedal. Think of when you are pedalling really slowly, with a heavy load – there will be a lot of pushing going on, probably a bit of wobbling side to side and a little cursing as well.
Compare this to when the chain is on the big cog (closest to the wheel spokes) your legs spin faster and everything is easy, birds sing, the sun shines.
The advantages of a Derailleur style gearbox are they are easy to service, have a wide range of gear ratios available, they are typically lighter and they add very little additional drag to the drive train.
The main negative is the chain needs to be moving for the gears to change (which is why you should never change gears while you are stationary) they can be damaged or knocked out of alignment in an accident and they do need adjustment from time to time to keep them running perfectly.
The other style of gearbox is a hub system. In this instance, all the gubbins are safely stored inside the middle of the wheel.

The biggest advantage of this system is you can normally change gears at any time, even when stationary. The downside is they can add significant drag to the drive train, they tend to have fewer gears available and if/when things do go wrong they can be more complex to fix.
The gear changer (or shifter) on both systems is mounted on the right side of the handlebars, and typically has two levers – one operated by the thumb and the other by the trigger finger.

On occasion, you may find a twist shifter, which as the name implies is the inner part of the handlebar grip that is rotated to change the gear.
And rarer still, but still worth a mention is the Shimano Di2 with an ‘automatic gearbox’. Basically, it senses how fast you are going and selects an appropriate gear to suit.
Choosing the level of assistance you need
So, now you have a basic understanding of the drive train, how do we best use it to maximise the benefits of a mid-drive system?
The level of assistance provided by the mid-drive motor is controlled via a bar mounted control, which typically have a combination of Up and Down buttons. Different systems have different terminology but in a nutshell, there will be a low, medium and high levels of assistance with UP being more assistance, and the DOWN offering less.
Bosch has assistance levels of Off > Eco > Tour > Sport > Turbo, while Shimano Steps has Off > Eco > Normal > High

Both the Bosch and the Shimano systems ‘multiply’ how hard you are pushing on the pedals depending on the assistance level selected.
Bosch, for example, multiplies your pedalling force by (and as a trade-off reduce your battery range by a similar amount)
Eco + 40%
Tour + 100%
Sport + 150%
Turbo + 225%
This assistance level selected is purely the amount of force provided. Think of it like a small child being pushed on a bike.
Eco = Dad gently pushing
Turbo = Dwayne “The Rock” Johnson giving it everything he’s got
Both are going to have the same top speed due to the imposed cutoff, but The Rocks going to get you there a lot quicker (probably – depending on the Dad he is up against)!
Even though the mid-drive motor has good torque, they still have a power-band where they perform best – just like the engine in a car. When you set off driving a car you select a low gear, and then accelerate and begin moving. Then at the appropriate time (based on the engine revs), you shift up gears, the motor’s revs drop and then increase again as you accelerate. And you repeat the process until the desired speed is achieved. (Same process when driving an automatic vehicle except the gearbox will decide when to shift for you).
If you try and move off in a high gear the motor will struggle, taking longer to accelerate and potentially stalling altogether.
Riding a mid-drive e-bike involves a very similar process with the Power Assist level in combination with your own power input via the pedals being the equivalent of the accelerator and the rear “gearbox” at the back wheel being … well … the Gearbox.
The ‘Revs’ are how fast your legs are going around, which is called “Cadence”.
Cadence is measured in revolutions or turns of the pedals. Every time one of your pedals goes through a full circle, this is one revolution and Cadence is the number of revolutions that one pedal goes around within a minute.
So when you see “80RPM” as an example, this is one pedal going around 360 degree’s 80 times in a minute… phew sounds exhausting! but actually, the majority of riders will find between 70 and 90 RPM the comfortable range of cadence.
For a mid-drive motor to be within its best Rev range, your legs also need to be going around at the same speed which conveniently enough for the Bosch and Shimano systems is between 70 and 90 RPM.
Remember, for reference, an ‘easier’ gear is when your pedals/legs are going around faster, and a harder gear is when you are labouring away at slower revolutions.
So, back to the riding!
Let’s walk (or rather Ride) through the process of moving off from a standing start;
First and most importantly, if you have a rear Cassette and Derailleur type ‘gearbox’ you MUST change into an easier gear before you come to a stop. When shifting down you need to rotate the pedals at least 360 degree’s to make sure the gear is fully engaged. This can be done while coasting to a stop, as long as the pedals are being turned.
If you try to change gears while stationary, when you go to move off the chain will start moving across the different cogs, terrible noises will occur, the chain will jump and potentially fall off, your pedals could free spin, feet can slip off the pedals which will immediately retaliate by smashing into your shins … you get the idea.
DON’T CHANGE GEARS WHEN STATIONARY!
If you forget to change down before stopping, you’re just going to have to set off in a higher than ideal gear. Don’t worry, that Torquey mid-drive system will save you once you start pedalling. Once rolling you can reduce your pedalling power and shift down to an easier gear.
Ok, so there you are stopped at the lights, in your lower gear
Firstly decide how fast you would like to accelerate and select the appropriate setting on the drive display (low/mid/high). You can adjust this as you ride but some can find it disconcerting to have a lot of power assistance at low speeds, or on the flip side others want to accelerate as quickly as possible before reducing the level of assistance once underway.
[Light goes green]
Start pedalling, the mid-drive motor will very quickly start assisting at the selected pre-set level.
Once your Revs (cadence) has increased above a comfortable level, shift your gears to the next hardest setting while continuing to pedal (always pedal when changing gears remember).
You will hear the mid-drive motor temporarily reduce power while the shift is performed, then will restart (this is an inbuilt function to protect the drivetrain). You will actually hear the motor’s pitch drop then increase as you accelerate much the same as a car engine’s after each gear shift.
Continue to pedal and again when your revs/cadence has increased enough, shift gears again.
Repeat this process until you reach a speed you are comfortable with.
Should you wish to have more or less assistance from the mid-drive motor you can adjust the assist level at any time.
Tackling hills
You will find you will need to increase the assistance level when you come to a hill. If you are in a lower assistance setting your speed will probably begin to decrease as you start to climb the hill.
To overcome, keep pedalling and change into a lower gear (one that is easier to pedal), and then increase the level of assistance (i.e. from ‘tour’ to ‘sport’).
Changing down will put the mid-drive motor into it’s more efficient power band and as the motor cuts out to allow the gear change, you will resume peddling at an easier rate.
So, there you are riding along changing gears and adjusting assistance levels… now, how do you stop !!!
It’s simply the reverse of the setting off process. Remember to start shifting into easier gears while pedalling as you decelerate. You want to be in the correct gear prior to stopping. If need be, adjust the assistance level at the same time (or this can be done while stationary) to your preferred starting level.
Oh, and don’t forget to apply the brakes while all this is going on.
Yes… but…
This all sounds very complicated… “Why can’t I just ride around in the highest or lowest level of assistance and forget about using the gears?” you ask.
To be honest there is nothing wrong with riding this way. There are some negatives, however:
Battery life – using constant high levels of assistance can dramatically reduce the range of the battery (more fun = less battery).
Take off speed – Setting off from a standing start on a heavier bike (such as a Cargo bike) can be hard work. Given that you may well be at the head of other road traffic it’s best to accelerate as fast and as safe to do so. Staying in a low assistance level means you will have to pedal MUCH harder to get going which defeats one of the major benefits of riding an e-bike really!
Control – When you are pedalling at a low cadence you may find your balance is not as good as when you are pedalling faster. This is especially true as you set off from stationary. Try setting off in a high gear and you may find yourself wobbling over the road until you gain momentum.
Riding smoothness – when riding in the highest power setting you will find the bike will accelerate VERY quickly, and then reach the speed limit cutoff of 25kmh. The motor will then immediately stop all assistance (Shimano) or quickly reduce assistance (Bosch). Depending on your input (i.e. how hard you are pedalling) your speed may then start to reduce until you fall below the speed limit cutoff at which point the motor will provide full assistance immediately and you will lurch forward again until you hit the speed limit and repeat ad-nauseam. This “bouncing” of power is not kind to the drive train and isn’t the most comfortable way to enjoy a bike ride. On top of that, the motor noise kicking in and out at full power can be pretty annoying.
Efficiency – While an electric motor has a broader power band than combustion engines, they still have an optimum range. Using a mid-drive motor at low motor speeds will affect its performance. Try moving off from the lights in a high gear compared to a low gear with shifting and you will see what we mean.
Drivetrain wear – Using the full range of gears will help even out the wear on the drivetrain, especially the rear cassette. Mid-drive motors do create more wear on the drive train due to the torque being applied. Using all the cogs on the rear cassette means they all wear evenly, along with the chain.
So there we have it, our guide to riding a mid drive e-bike system. Reading all this it might sound like rubbing your head and patting your belly at the same time but after a few rides, it will all become second nature. If you have not spent much time riding a bike previously, or it’s been a while we would suggest finding a quiet place to practice the starting and stopping process – just to get to grips of where all the controls are and how they work and interact with each other and what levels you are comfortable using.
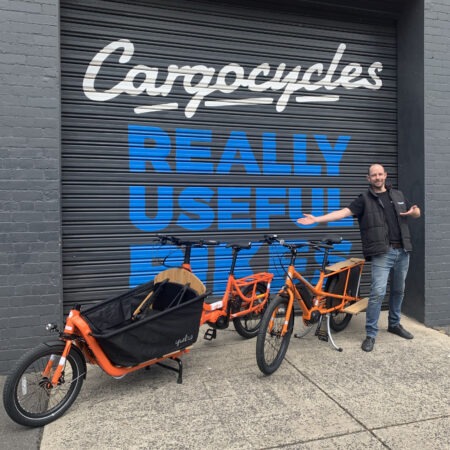
When you purchase your bike from us at Cargocycles we will also adjust the placement of the controls so they fall within easy reach. Feel free to pop in if you need this adjusted and we will be more than happy to help.